
Medieval paints and pigments for practical application
Since this question is asked so often in different online forums and on Facebook, I thought, I would put together a practical, rough guide to medieval paint applications for all kinds of paintwork.
Before I start, I recommend to have a look at the literature recommendations at the end, which are in my opinion essentials if you want to work on the topic (some I have in a german translation, but I am sure you can find a good english one easily).
On the mixtures: In painting, there are no fixed rules. Every painter finds his own mixtures and recipes for the particular task at hand. It is definitely something that needs time to get experienced in. I will show you some basic mixtures and you can go on from there.
Preparing surfaces:
Many surfaces (Wood, raw hide, canvas) can be prepared by applying Gesso. Gesso can be made from different mixtures. Most in use is chalk powder, white pigment or gypsum mixed with lightly hardened linseed oil or water and fish glue/skin glue. The surface will become lighter, the colours applied over it will be more brilliant and the colour will stick better.
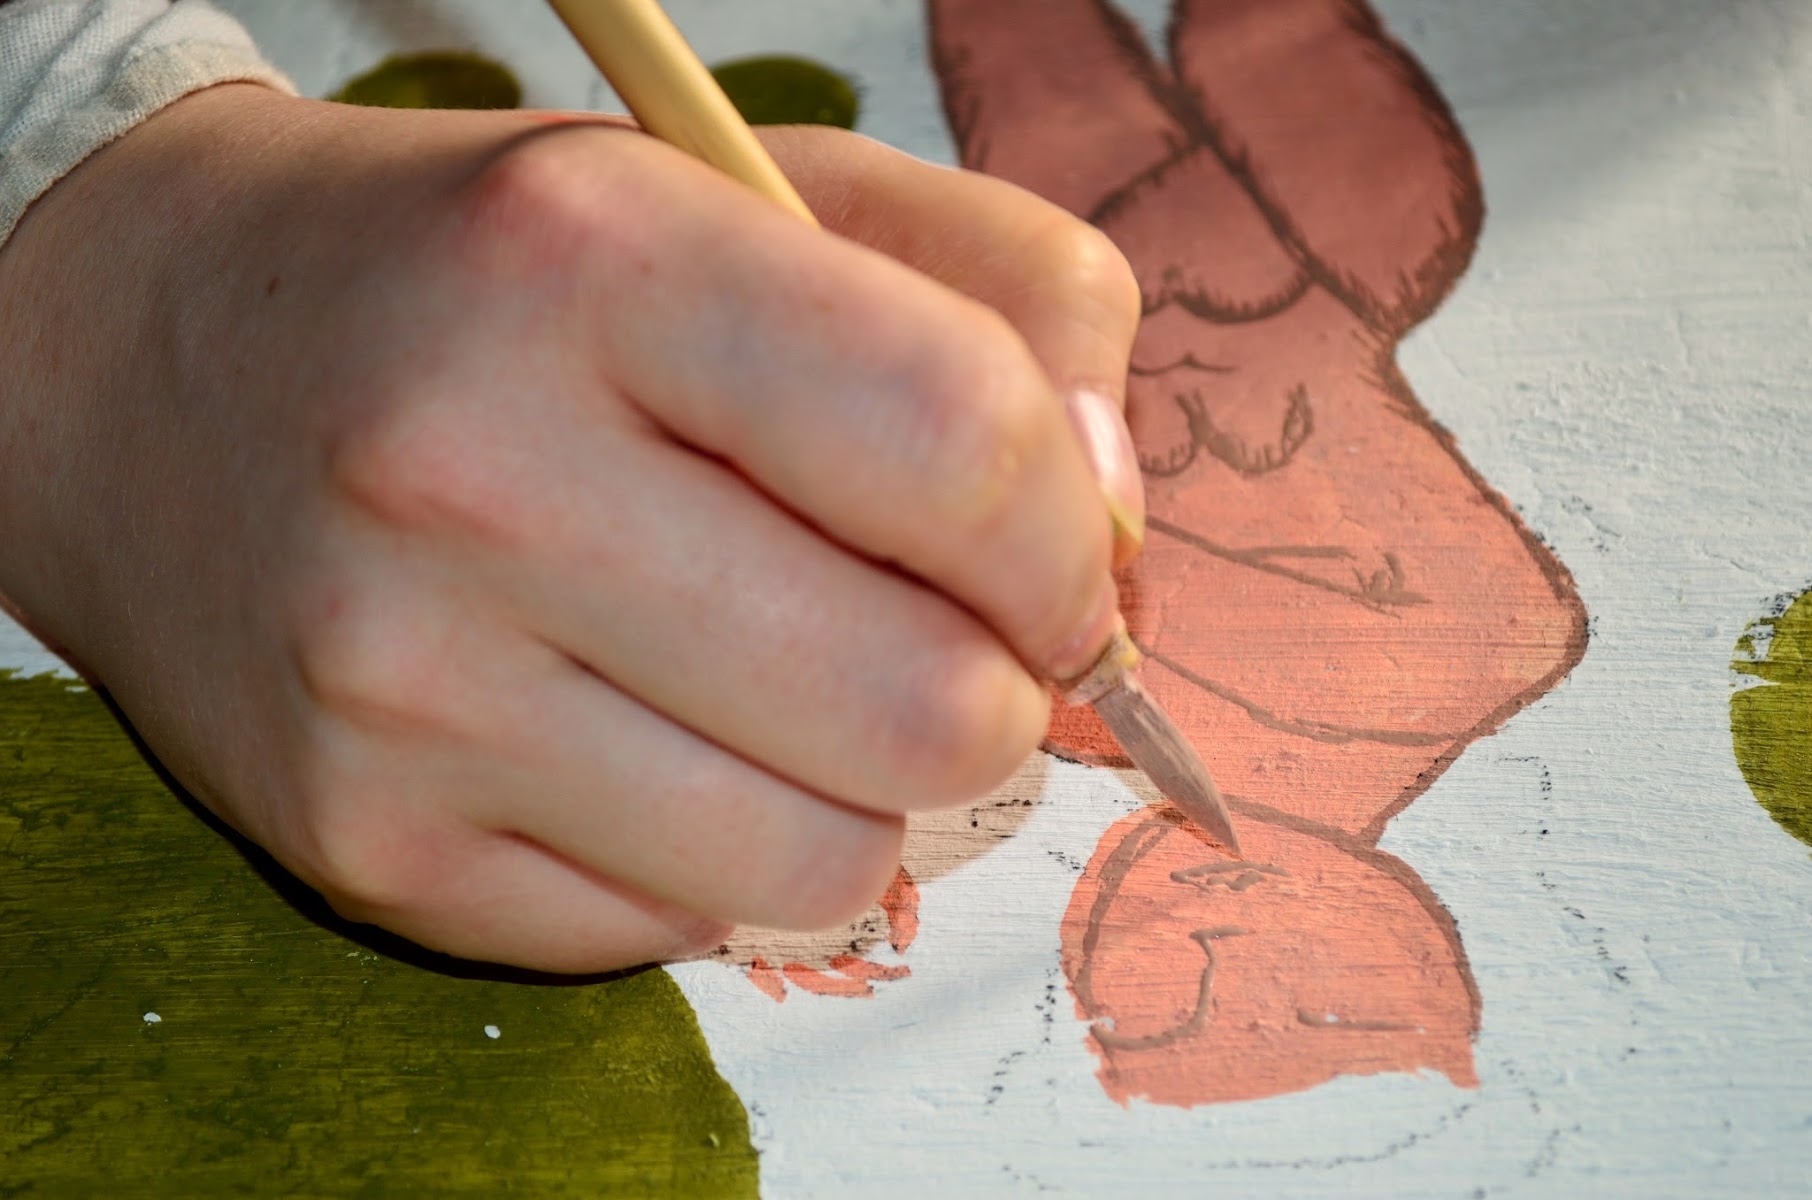
Sketching:
Coal pencils:
You can usually buy them in arts supply stores, mostly they are charred willow sticks, that are brought to length and packaged up. Could also be a nice project for your next outdoor event to make them yourselfes.
Ruddle pencils:
Today, the form in which you can buy ruddle is as a wooden pencil with the ruddle inserted. Back „then“ artists usually used the raw mineral brought into a pencil form
Attention: Ruddle as well as coal can rub off and will most probably not remain nice forever without a fixture.
Silver pencil:
This can be used on different surfaces, silver pencils were mostly in used in the 15th century . In order for the pencil to work, the surface needs tob e treated with Gesso, ideally containing gypsum or egg yolk, these two ingredients bring the silver to oxidise so that the lines will be darker.
Lead Pencil:
This is quite literally a piece of lead in a bone or wood fixture so it can be held.
Colour bases:
(these will be mixed with the pigments)
Eggs:
One of the most simple bases is just eggs. It can be used in full or just the yolk (more oils, will be greasier and dry slower, but will make the colour more pleasant to work with) or just the white (more protein, will be more brittle, but lighter and dry quicker). In any case, the egg needs to be beaten thoroughly before the use. Cennino Cenini recommends to press it through a fine sponge several times in order to get rid of the stringy structures in it. Egg colour will stick very wellt o all kinds of surfaces, the yellow of the yolk will fade very soon and not disturb the pigments.
Also, eggyolk contains a natural emulsifier, that will do a great job combining watery and oily bases in all kinds of colour mixtures.
Egg tempera:
Typically, egg tempera is a mixture of 1 part full egg and 1 part oil (f.e. linseed oil). If needed, water can be added. Egg tempera works on all surfaces, we like to especially use it on metal surfaces. It is one of the most classic colour bases, used up until today by painters.
ATTENTION SHIELD OWNERS! For painting historical shields, Egg tempera on chalk gesso is the way to go!
Oil paint:
Very simply put, oil mixed with pigment. If you leave linseed oil open for a few weeks or months, it will naturally harden and become thicker (Cenini recommends to let the bottle stand in direct sunlight to get the best results. So you can regulate the thickness oft he colour from a firm paste to an almost watery consistency when using oil paint. In your local arts supply, you can probably also buy thickened linseed oil ready to use.
Oil paint will dry very slowly and will sometimes take weeks or even months to fully harden, it will make grease stains on fabric which will fade overtime. But it will stick to the surface securely and make the colour very brilliant.
Attention, for wall painting, oil based bases are not recommended. Especially oil paint will – if exposed to weather and sun – darken over time and the picture will be ruined.
Casein paint:
Casein base is mixed from milk protein and a chemical to break the protein up. The protein can come from different soures, for example milk or cheese. The less fat there is in the milk product, the better. We want more protein and less grease here. Casein base can also be used as a glue for fine woodwork.
To break the protein, different chemicals can be used. What you can buy in todays art supply as „casein paint“ is usually made with Borax. That is not wrong, since it was also used in medieval times, but more common would be lime.
Attention: Please use slaked lime, not quicklime! Quicklime is not only dangerous to handle, it will also be bad for the paint because the lime keeps reacting in the paint over years and can destroy the paint in time. The older the slaked lime is (the longer the lime has rested in water), the better. For fine arts, painters today making their own bases usually use slaked lime that is up to 20 years old. But for a hobby reconstruction that only has to work for a few decades, 1-2 year old slaked lime will probably do.
I like to use 5 parts of half fat cheese and 1 part slaked lime and add water if needed. When added to the cheese, the lime will make the cheese more liquid, kind of gooey and it will probably smell a little funny. Like milk gone bad. Leave the mixture sit for a few hours, it will be better and smoother if it can rest a little.
Casein paint will give a sort of „greasy“ shine on the surface of the dried paint, somewhat similar to modern acrylic paint.
I like to use casein paint on stone, wood and other rather rough surfaces, that wont bend as much. However, surprisingly, when trying out paints for painting our linnen tent, casein was our winner since it was the one that – exposed to humidity and sunlight – did neither rot nor smear. It does chip a little on flexible surfaces, but when it chips, you can repaint, if it smears or rots, the tent is ruined.
Skin-, fish- or bone glue:
All of these glues are based on the same principle, Polysaccharides that are a part of many organical substances, especialls animal parts. These can be solved in water by cooking them. If you do this for a longer time, it will become Gelatine and gelatine can be used as a glue.
You can either make this yourself or buy it from an arts supply shop as a granulate, which only needs to be mixed with hot water. You can deciede how thick you want the base to be, but usually, the glue will constrict when cooling down, meaning that if it is applied very thickly on a very smooth surface like metal, it will most probably chip and fall off. You definitely want to use a Gesso for this base.
ATTENTION SHIELD OWNERS! I personally had some very good experiences with watery glue base for shield painting, the paint can be easily applied, layered and didnt chip.
Wax/Encaustic:
When using way based paint bases, you usually mix bees wax with turpentine, resin or pitch and sometimes a bit of oil, heat it and then use it. The consistency of this base at room temperature can go from a firm paste to a watery solution, depending on the mix. Wax based paints are great for painting bone gravings or wooden surfaces. A very famous example oft he use of wax paint are some oft he mummy portraits from Egypt. The colour will be very brilliant and durable.
Gummi Arabicum:
This is also a form of water soluable glue from polysaccharides, that is won from certain sorts of acacia trees. It is often used as an additive into other paint bases, but is especially known for making ink for writing, because it is able to bind the pigments to water so that it will not fall of the parchment or collect at the edges of the paint spots. It is a standard equipment for book illumination.
Lime water:
This base is only used for fresco painting. A little slaked lime is mixed with water and pigments. The surface for fresco is made from sand and lime and is still wet when applying the paint. When the paint dries with the surface, the lime cristalizes and locks the pigments in the cristals. This makes frescos durable for centuries and millenia. The paint becomes quite soft and looks beautiful.
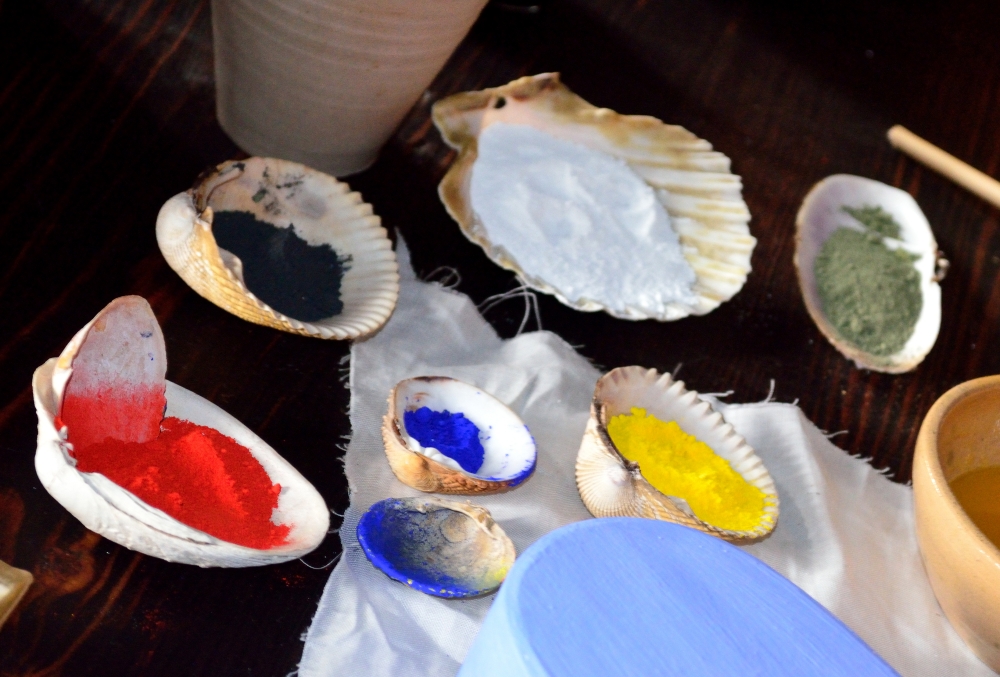
Pigments:
Here I want to give some examples of historically accurate pigments used in medieval Europe:
Red:
Red ocre is available in all kinds of shades and is quite cheap to get. Darker reds and aubergine tones can be done with iron oxide, a dark deep red from hematite or dragon blood (a pigment won from a certain plant).
Further possibilities are Kermes lack pigment or madder lack pigment
Brown:
Brown ocre is available in all kinds of shades from a light camel to an almost black brown.
Yellow:
Here I also recommend ocre in different shades
Green:
For a green that is more on the yellow side, green ocre (f.e. from Verona) is great, for a more blue based green, copper oxide is great
Blue:
Blue is one of the most expensive pigments and can be won from azurite or lapislazuli in medieval times. Azurite will give you a more turquoise lighter blue, lapislazuli is a rather deep and dark blue. You can still buy different qualities of azurite and lapislazuli as a pigment today, but they are still rather expensive. Cenini also mentions „Bagdad indigo“ as a pigment to imitate lapislazuli.
White:
Originally the most used white pigment was lead white. This is – as commonly known – a poisonous chemical, so I recommend using a modern pigment
Black:
Lamp black/grime or burnt bone pigment are ideal for a deep black
Purple:
Purple is very difficult to make, mixing natural pigmens will probably give you rather a sort of brown based purple or aubergine colour. Some sorts of ironoxide mixed with white can turn into a more Lilac tone. Genini recommends indigo lack pigment and madder lack pigment or hematite red as a mix. Purple can also be reached by layering paints
Next to theses pigments, finely ground metals (gold and silver mostly) and ground semi precious stones can be used as pigments.
Here is a nice overview of historical pigments
Weiterführende Literatur:
Cennino Cenini – Libro dell’arte, f.e. in this translation of Daniel Thompson
Max Doerner – Malmaterial und seine Verwendung im Bilde
Theophilus Presbyter – Schedula Diversarum Artium
Related Posts
The following posts might interest you as well:


